Omni Instruments
contact icon+44 (0) 1382 443000
+44 (0) 845 9000 601
WE ARE HERE TO HELP

Contact our technical sales team now to discuss your requirements

help icon
MY BASKET basket arrow

£0.00

My Cart

You have no items in your shopping cart.

Click basket to edit.

Products

Latest added news blog
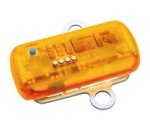
MSR175 Shock Transportation Data Logger
Kenny Laidlaw
Oct 01,2018
The MSR175 shock transportation data logger is the newest miniature logger from MSR.  The MSR175 ut...read more >

8999900038

8999900038

Quick Overview

Remote mounting kit for HMI FieldLogger with 1.8 m cable

Details

The FieldLogger's HMI (Human-Machine Interface) can be assembled remotely to the equipment, being connected to it via a cable. This kit makes such operation easy, for it supplies all parts necessary to attach the HMI to a panel, connecting it to the FieldLogger to read the interested data.

When unpacking, besides this Quick Guide you shall have:

  • A plastic base for the FieldLogger HMI;
  • A Drilling Diagram;
  • A 1.8 m-length cable;
  • Three screws (Phillips 4x20 mm);
  • Three nuts (M4).

INSTALLATION (See figures in datasheet)

  1. Drill holes on the panel using the Drilling Diagram (Fig. 01).
  2. Attach the HMI base using the screws and nuts (Fig. 02).
  3. Connect and attach the cable behind the base, screwing it (Fig. 03).
  4. Attach the HMI to the base. Make sure it is well fixed! (Fig. 04).
  5. Attach the other end of the FieldLogger cable, screwing it. The FieldLogger lid must be taken off to access the DB9 connector (Fig. 05).

HMI must be installed horizontally!

REMOVING THE HMI
HMI can be removed at any time. Just separate the side latches and pull it out carefully (Fig. 06).

Availability: Stock Item