The SER-9500 Tinytag Service Kit is a universal service kit for all Tinytag Ultra, Plus and View data loggers. The kit contains all the appropriate parts required for servicing Talk, Ultra, Plus, View, IS and Re-Ed loggers.
Instructions for servicing Tinytag Talk, Ultra, Plus and View data loggers.
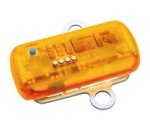
Talk Data Loggers
For use with logger models:
TK-0014, TK-0023, TK-0040, TK-0063, TK-0102, TK-0302, TK-0702, TGM-0040, TK-4014, TK-4014-MED, TK-4023, TK-4702, TK-4703, TK-4802
- Carefully remove the unit’s lid and desiccant pack (if included) and gently squeeze the sides of the canister to release the data logger. Taking care to touch only the edges of the circuit board, withdraw the data logger from its case.
- Remove the old battery from the unit and check that the battery holder contacts are clean.
- For Tinytalk data loggers (starting TK-0 or TGM): Whilst observing the correct polarity, and taking care to touch only the edges of the circuit board, insert the new battery whilst checking that the unit’s green LED lights for approximately four seconds and then goes out. If it does not, remove the battery for 30 seconds and try again.
For Tinytag Talk 2 data loggers (starting TK-4): Wait five minutes and then, whilst observing the correct polarity, and taking care to touch only the edges of the circuit
- board, insert the new battery whilst checking that both of the unit’s LEDs flash briefly.
- Connect the data logger to the computer and check Tinytag Explorer can communicate with it.
- Put the data logger back in its canister with its communication port facing upwards.
- Slip the new desiccant pack into the canister beside the data logger - do not fit the desiccant pack in TK-0302 Tinytalk relative humidity loggers.
- Re-fit the unit’s lid.
Tinytag Plus and TinyView Loggers
For use with logger models:
TV-0020, TV-0050, TV-0073, TV-0076, TV-0104, TV-0204, TV-0304, TV-1500, TV-1501, TV-1505, TV-1506, TV-1510, TV-1515 TV-4020, TV-4050, TV-4076, TV-4104, TV-4204, TV-4500, TV-4501, TV-4505, TV-4506, TV-4510, TV-4704, TV-4804, TV-4810
- If fitted, cut off the calibration seal.
- Unscrew the lid and remove the foam spacers. Carefully lift out the circuit board, touching it only at the edges.
- Remove the old desiccant pack and the battery from its holder. Check the battery holder contacts are clean.
- For Tinyview Plus data loggers (starting TV-0/1): Whilst observing the correct polarity, and taking care to touch only the edges of the circuit board, insert the new battery whilst watching the unit’s display. The display should cycle through a few short messages before eventually saying ‘StoP’. If it does not, remove the battery for 30 seconds and try again.
For Tinytag View 2 data loggers (starting TV-4): Wait five minutes and then, whilst observing the correct polarity, and taking care to touch only the edges of the circuit board, insert the new battery whilst watching the unit’s display. The display should flash briefly as the battery is inserted, and then go out.
- Connect the data logger to the computer and check Tinytag Explorer can communicate with it.
- Fit the new desiccant pack and carefully replace the circuit board, ensuring the correct orientation and that no wires are trapped between the circuit board and its supports.
- Remove the old ’O’ ring from the box and check that the two mating surfaces and screw thread are clean before fitting the new one.
- Re-fit the foam spacers with their smooth sides facing up. Replace the lid, turning it until it meets the stop.
- Replace the connector cap lanyard if necessary.
Calibration seals, if fitted, can only be replaced by an authorised distributor.
Tinyview RH loggers that incorporate blue wires and grey ribbon cable should always be re-calibrated after the case is opened for any reason.
Tinytag Ultra and Ultra 2 Data Loggers
For use with logger models:
TGU2K-0017, TGU2K-0020, TGU2K-0050, TGU2K-0073, TGU2K-0104, TGU-0017-2K, TGU-0020-2K, TGU-0050-2K, TGU-0073-2K, TGU-0104-2K, TGU-0017, TGU-0020, TGU-0050, TGU-0073, TGU-0104, TGU-0304, TGU-1500, TGU-1510, TGU-1515, TGU-4017, TGU-4020, TGU-4500, TGU-4510
- Remove the data logger’s cover by unclipping the catches on either side of the unit.
- Remove the battery from its holder and check that the battery holder contacts are clean.
- For Tinytag Ultra data loggers (starting TGU-0/1 or TGU2K): Whilst observing the correct polarity, and taking care to touch only the base of the unit, insert the new battery whilst checking that the unit’s green LED lights for approximately four seconds and then goes out. If it does not, remove the battery for 30 seconds and try again.
For Tinytag Ultra 2 data loggers (starting TGU-4): Wait one minute and then, whilst observing the correct polarity, and taking care to touch only the base of the unit, insert the new battery whilst checking that both of the unit’s LEDs flash briefly.
- Connect the data logger to the computer and check Tinytag Explorer can communicate with it.
- Refit the data logger’s cover.
Tinytag Plus, Plus 2 and IS Data Loggers
For use with logger models:
TGP-0017, TGP-0020, TGP-0050, TGP-0073, TGP-0104, TGP-0204, TGP-0304, TGP-0605, TGP-0610, TGP-0650, TGP-0901, TGP-0903, TGP-1903, TGP-0940, TGP-1500, TGP-1510, TGP-1515, TGP-4017, TGP-4020, TGP-4104, TGP-4204, TGP-4500, TGP-4505, TGP-4510, TGP-4520, TGP-4810, TGPR-0704, TGPR-0804, TGPR-1001, TGPR-1201, TGIS-0017, TGIS-0020, TGIS-0304, TGIS-1500, TGIS-1580
- Open the case by undoing the four bolts, starting on opposite diagonals.
- Remove the old desiccant pack, cable tie (if fitted) and battery from the unit and check that the battery holder contacts are clean.
- For Tinytag Plus data loggers (starting TGP-0/1 or TGPR): Insert the new battery, observing the correct polarity and taking care not to touch the unit’s circuit board, checking that the unit’s green LED lights for approximately four seconds and then goes out. If it does not, remove the battery for 30 seconds and try again.
For Tinytag Plus 2 data loggers (starting TGP-4): Wait one minute and then insert the new battery, whilst observing the correct polarity, and taking care not to touch the unit’s circuit board, whilst checking that both of the unit’s LEDs flash briefly.
For Tinytag Plus Intrinsically Safe data loggers (starting TGIS): Loop the supplied cable tie through the slot in the underside of the battery holder. Insert the new battery, observing the correct polarity and taking care not to touch the unit’s circuit board, checking that the unit’s green LED lights for approximately four seconds and then goes out. If it does not, remove the battery for 30 seconds and try again.
- Connect the data logger to the computer and check Tinytag Explorer can communicate with it.
- For Tinytag Plus Intrinsically Safe units (starting TGIS): Secure the battery with the cable tie.
- Remove the old ’O’ ring from the lid and check that the two mating surfaces are clean before fitting the new one.
- Replace the desiccant pack. Note: Do not fit the desiccant pack in the TGP-0605/0610 shock or TGP-0650 vibration data loggers.
- Re-fit the lid, tightening the bolts starting on opposite diagonals. For data loggers starting with the part number, TGP or TGPR it is recommended that these bolts should be tightened to a torque of 80 cN.m. For data loggers starting with the part number TGIS, it is recommended the bolts should be tightened to a torque of 60 cN.m.
- Replace the connector cap lanyard if necessary.
Intrinsically Safe loggers MUST NOT be serviced in a hazardous area.
To comply with the certification for Intrinsically Safe loggers, a Tekcell SB-AA02P, SAFT LS14250 or LST14250 battery must be used.
Please note, Omni Instruments Ltd also offers a service calibration on all Tinytag data loggers. This service includes a UKAS traceable calibration certificate, plus new batteries, seals and desiccant pack. Pricing for the service calibrations are included at the bottom of this page, as well as a calibration return form that you can return with your loggers to us.

 +44 (0) 845 9000 602
 [email protected]